Embarking on a camping expedition doesn’t mean bidding farewell to your favorite morning ritual. Brewing the perfect cup of coffee amidst nature is an art, and in this guide, we’ll explore the ins and outs of making camping coffee. From basic techniques to the best methods, this blog post aims to be your go-to resource for elevating your outdoor coffee experience. Let’s dive into the world of Camping Coffee.
Table of Contents:
- How to Make Coffee While Camping: When you’re out in the wilderness, the process of brewing coffee takes on a unique charm. Begin by selecting the right gear for your camping style, whether it’s a lightweight pour-over set or a rugged French press. To make coffee while camping, start by heating water on a portable stove or campfire. Experiment with different techniques, adjusting the grind size and steeping time to achieve your preferred flavor profile. Remember, the key is adaptability, so be prepared to make coffee in diverse environments.
- Best Way to Make Coffee When Camping: Uncover the ultimate method for brewing that perfect cup amidst the beauty of nature. The best way to make coffee when camping often depends on personal preference and the level of convenience you desire. Explore the simplicity of a pour-over system, the robustness of a French press, or the convenience of a portable espresso maker. Tailor your brewing method to your camping environment and personal taste, ensuring a delightful coffee experience every time.
How to Make Coffee While Camping:
Brewing coffee while camping is an art that requires a combination of preparation and adaptability. To start, invest in lightweight and portable coffee-making equipment that suits your camping style. A pour-over system is ideal for backpackers, providing a simple yet effective way to make coffee with minimal equipment.
Items Needed to Make Coffee While Camping:
Regardless of the method you choose, there are essential items you’ll need to make coffee while camping. These include:
- Coffee Making Device: Select a lightweight and portable coffee maker based on your preference (pour-over, French press, or espresso maker).
- Coffee Beans: Choose high-quality coffee beans and consider pre-grinding them or bring a portable grinder for freshness.
- Water Heating Source: Invest in a portable stove or use a campfire for heating water.
- Kettle: A durable and lightweight kettle is essential for heating water to the right temperature.
- Filters (for pour-over): If you opt for a pour-over method, bring paper filters suitable for your pour-over device.
- Stirring Device: For French press coffee, a stirring device ensures proper extraction during steeping.
- Mug or Travel Cup: Pack a durable and insulated mug to enjoy your freshly brewed coffee on the go.
Best Way to Make Coffee When Camping:
Determining the best way to make coffee when camping involves considering various factors, including personal preference and the camping environment. The pour-over method stands out for its simplicity and versatility. It allows you to control the brewing process, making adjustments to suit different coffee beans and taste preferences.
Percolator for Camping Coffee:
For campers who appreciate a classic and time-tested method of brewing coffee, a percolator is an excellent choice. The percolator, with its iconic design, allows you to enjoy a rich and flavorful cup of coffee while immersing yourself in the outdoor experience. Unlike modern methods, a percolator brews coffee by cycling hot water through the coffee grounds, providing a unique and traditional coffee-making process.
Steps for Making Coffee with a Percolator:
- Gather Your Equipment:
- Camping percolator
- Coarsely ground coffee beans
- Kettle for heating water
- Campfire or portable stove
- Assemble the Percolator:
- Disassemble the percolator and ensure all parts are clean.
- Assemble the percolator by connecting the stem and basket, placing the basket over the tube.
- Add Coffee Grounds:
- Measure coarsely ground coffee beans and add them to the percolator basket.
- The recommended coffee-to-water ratio is typically 1 to 2 tablespoons of coffee per 6 ounces of water.
- Fill the Percolator with Water:
- Pour cold water into the percolator’s water chamber.
- Ensure that the water level is below the bottom of the coffee basket.
- Assemble the Percolator Lid:
- Place the percolator lid on top, ensuring a snug fit.
- Some percolators have a clear knob that allows you to monitor the brewing process.
- Heat Water:
- Use a campfire or portable stove to heat water in a kettle.
- Bring the water to a boil, as the percolator requires hot water to cycle through the coffee grounds.
- Place Percolator on Heat Source:
- Set the percolator on the heat source, allowing the water to boil and circulate through the coffee grounds.
- Monitor the Percolation:
- Keep an eye on the percolator’s clear knob or listen for the characteristic percolating sound.
- The coffee is percolating when you see a steady stream of bubbles or hear the rhythmic percolation noise.
- Brewing Time:
- Let the coffee brew for 6 to 10 minutes, depending on your desired strength.
- Adjust the brewing time to achieve the preferred richness of your coffee.
- Remove from Heat:
- Once the brewing process is complete, carefully remove the percolator from the heat source.
- Serve and Enjoy:
- Allow the percolator to cool slightly before serving the brewed coffee.
- Pour the coffee into your mug or travel cup and enjoy the timeless flavor of percolator-brewed camping coffee.
- Cleaning the Percolator:
- Disassemble the percolator and dispose of the used coffee grounds.
- Rinse all parts thoroughly with water, ensuring that no coffee residue remains.
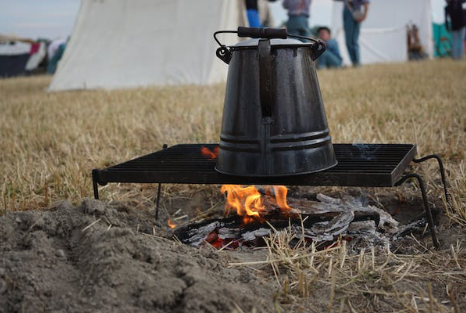
Using a percolator for camping coffee adds a touch of nostalgia to your outdoor experience, allowing you to enjoy a classic brewing method that has stood the test of time. The rhythmic percolating sound and the robust flavor of percolator coffee make it a favorite among camping enthusiasts seeking a traditional and reliable brewing method.
Pour-Over Camping Coffee
For a pour-over setup, you’ll need a portable pour-over device, paper filters, quality coffee beans, a durable grinder, and a kettle for heating water. Begin by placing the paper filter in the pour-over device and adding the desired amount of coffee grounds. Heat water on a portable stove or campfire until it’s just below boiling. Slowly pour the hot water over the coffee grounds in a circular motion, allowing the coffee to bloom and extracting rich flavors. Adjust the grind size and steeping time to achieve the perfect strength for your taste.
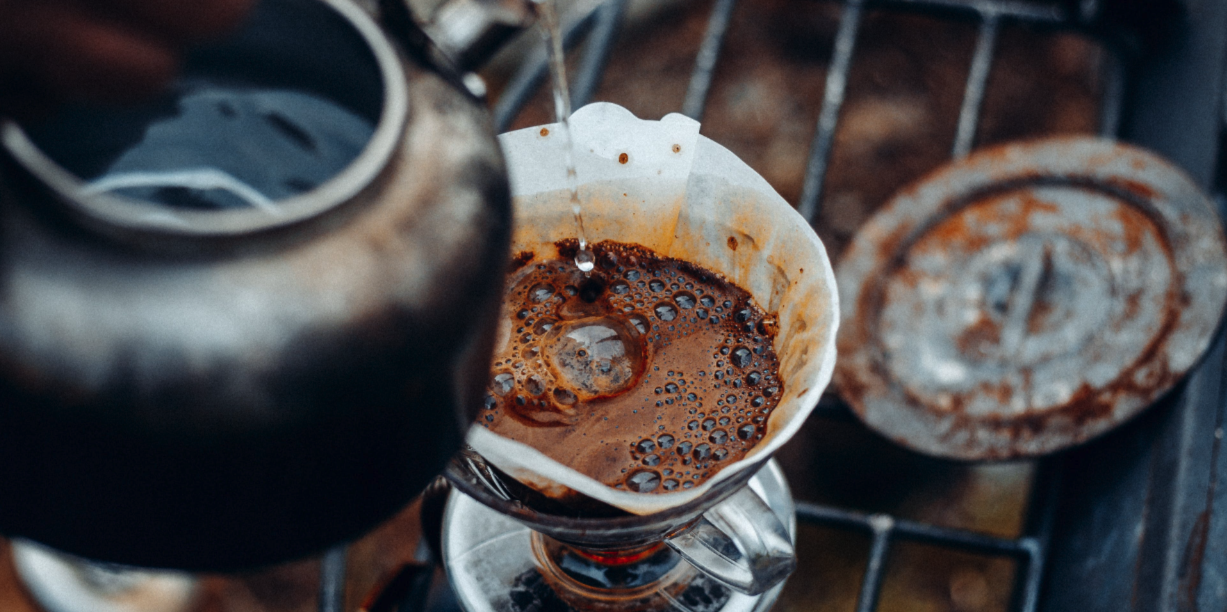
Steps for Making Coffee with a Pour-Over Setup:
- Gather Your Equipment:
- Portable pour-over device
- Paper filters
- Quality coffee beans
- Durable grinder
- Kettle for heating water
- Prepare Your Pour-Over Device:
- Set up your portable pour-over device on a stable surface.
- Place a paper filter in the pour-over cone, ensuring it sits securely.
- Measure Coffee Grounds:
- Measure the desired amount of coffee grounds based on your preferred strength.
- Grind Coffee Beans:
- Use a durable grinder to grind the coffee beans to the desired coarseness for pour-over.
- Heat Water:
- Use a portable stove or campfire to heat water in the kettle.
- Heat the water until it’s just below boiling, ideally around 200°F (93°C).
- Add Coffee Grounds:
- Place the measured coffee grounds into the paper filter within the pour-over cone.
- Bloom the Coffee:
- Pour a small amount of hot water over the coffee grounds to saturate them.
- Allow the coffee to “bloom” for about 30 seconds, allowing gases to escape and enhancing flavors.
- Pouring Technique:
- Starting from the center, slowly pour the hot water over the coffee grounds in a circular motion.
- Ensure an even saturation of the grounds, allowing the coffee to extract uniformly.
- Adjust Grind Size and Steeping Time:
- Experiment with the grind size and steeping time to achieve the perfect strength for your taste.
- Finer grinds and longer steeping times result in a stronger brew, while coarser grinds and shorter steeping times yield a milder cup.
- Enjoy Your Coffee:
- Once the water has passed through the coffee grounds, your pour-over coffee is ready to be enjoyed.
- Pour the brewed coffee into your mug or travel cup, and savor the rich flavors of your freshly brewed camping coffee.
French Press Camping Coffee
For those who prefer a bolder and more robust flavor, a French press is an excellent choice. This method involves steeping coarsely ground coffee in hot water and pressing down slowly to separate the grounds. To make coffee with a French press while camping, you’ll need a portable French press, coarsely ground coffee beans, a kettle for heating water, and a stirring device. Add the coffee grounds to the French press, pour hot water over them, and let it steep for a few minutes. Press down the plunger slowly to separate the grounds from the liquid, and you’re ready to enjoy a flavorful cup of coffee amidst nature.
Steps for Making Coffee with a French Press:
- Gather Your Equipment:
- Portable French press
- Coarsely ground coffee beans
- Kettle for heating water
- Stirring device
- Prepare the French Press:
- Ensure the French press is clean and assembled.
- Place the coarsely ground coffee beans in the empty press.
- Heat Water:
- Use a portable stove or campfire to heat water in the kettle.
- Heat the water until it’s just below boiling, around 200°F (93°C).
- Add Hot Water to Coffee Grounds:
- Pour the hot water over the coarsely ground coffee in the French press.
- Ensure all the coffee grounds are saturated by giving it a gentle stir with a stirring device.
- Let it Steep:
- Place the lid on the French press and let the coffee steep for a few minutes.
- The steeping time can vary depending on your preference, typically ranging from 3 to 5 minutes for a robust flavor.
- Press Down the Plunger:
- After the steeping time, press down the plunger slowly and steadily.
- Apply even pressure to separate the coffee grounds from the liquid.
- Pour and Enjoy:
- Once the plunger is fully pressed down, your French press coffee is ready to be poured.
- Pour the brewed coffee into your mug or travel cup, and relish the bold and flavorful cup of coffee amidst the beauty of nature.
- Clean the French Press:
- After enjoying your coffee, clean the French press by removing the grounds and rinsing it with water.
- This ensures the equipment is ready for your next brewing adventure.
Using a French press while camping provides a simple yet effective way to achieve a bolder and more robust coffee flavor. The method allows you to enjoy the richness of coarsely ground coffee, making it an excellent choice for those who appreciate a full-bodied cup of coffee in the great outdoors.
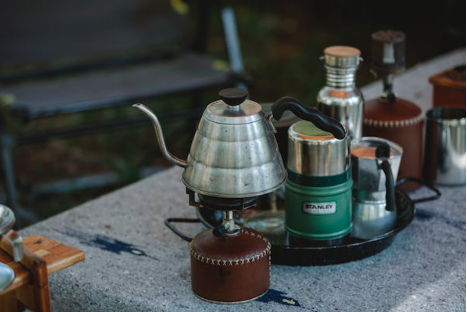
Espresso Camping Coffee
If you’re a fan of espresso, consider investing in a portable espresso maker designed for camping. These compact devices allow you to enjoy a concentrated shot of coffee even in the remotest of locations. To make coffee with a portable espresso maker, you’ll need the device itself, finely ground coffee beans, and hot water. Follow the manufacturer’s instructions for your specific espresso maker, which typically involves adding coffee grounds, adding hot water, and manually pressurizing the device to extract a rich and bold espresso shot.
Steps for Making Coffee with a Portable Espresso Maker:
- Gather Your Equipment:
- Portable espresso maker
- Finely ground coffee beans
- Hot water
- Prepare the Espresso Maker:
- Ensure the portable espresso maker is clean and assembled according to the manufacturer’s instructions.
- Familiarize yourself with the specific components of your espresso maker.
- Add Coffee Grounds:
- Open the espresso maker and add the finely ground coffee beans to the designated compartment.
- Be mindful of the recommended coffee quantity based on your espresso maker’s capacity.
- Compact the Coffee Grounds:
- Use the tamper, if provided, to compact the coffee grounds evenly.
- This step ensures proper extraction and a well-balanced shot of espresso.
- Add Hot Water:
- Heat water using a portable stove or campfire until it’s just below boiling.
- Pour the hot water into the water chamber of the espresso maker.
- Assemble and Pressurize:
- Follow the manufacturer’s instructions to assemble the espresso maker properly.
- Ensure a tight seal to build up pressure for extraction.
- Manually Pressurize:
- Depending on the design of your portable espresso maker, you may need to manually pressurize the device.
- This could involve pumping a lever, pressing a button, or using a hand-operated mechanism.
- Extract the Espresso:
- Once pressurized, the hot water will pass through the compacted coffee grounds, extracting a concentrated shot of espresso.
- Monitor the extraction time as per your taste preferences; a typical range is 25 to 30 seconds.
- Serve and Enjoy:
- Carefully pour the freshly brewed espresso into your mug or espresso cup.
- Savor the bold and rich flavors of your camping espresso shot.
- Clean the Espresso Maker:
- After enjoying your espresso, disassemble the portable espresso maker.
- Dispose of the used coffee grounds and rinse the components with water.
- Proper cleaning ensures the longevity of your espresso maker and maintains the quality of your coffee.
As you venture into the great outdoors, armed with the knowledge gained from this guide, making coffee while camping becomes a delightful and rewarding experience. Whether you prefer the simplicity of a pour-over or the boldness of French press coffee, the best way to make coffee when camping is the one that aligns with your personal taste and the unique demands of your camping environment. So, pack your gear, embrace the beauty of nature, and savor the joy of Camping Coffee in every sip.

